Stable Diffusion is a powerful AI-based image generation tool that has taken the creative world by storm. In this comprehensive guide, we will delve into the intricacies of Stable Diffusion, its operational principles, development history, and how it stands apart from other AI drawing applications.
Understanding the Stable Diffusion Model
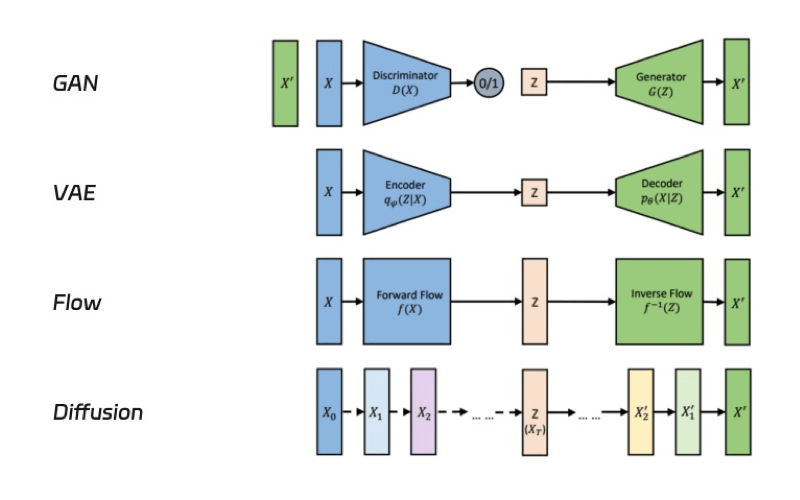
At the heart of Stable Diffusion is the diffusion model, a generative model widely used in image generation. This model works by progressively adding noise to training images until they become pure noise, and then reversing the process to generate new images. The Latent Diffusion Model, an advanced version of the diffusion model, operates in a lower-dimensional space, reducing computational demands and speeding up image generation.
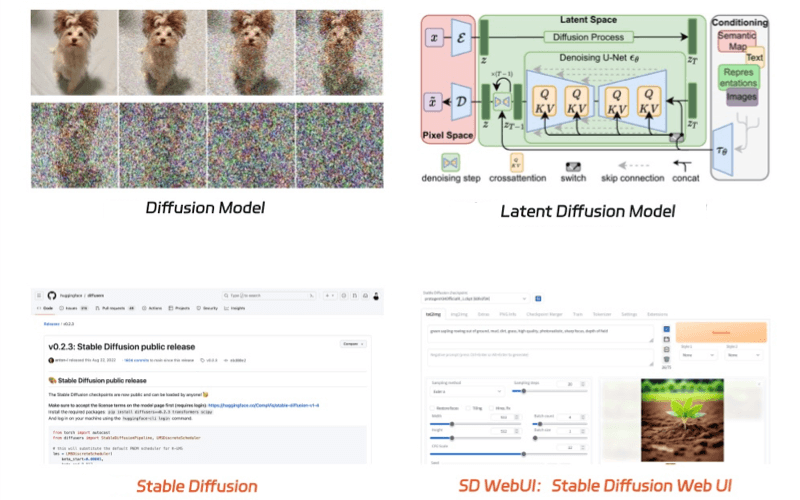
- Diffusion Model: The diffusion model is an algorithmic framework capable of generating images from textual descriptions. Mainstream AI drawing tools such as DALL·E, Midjourney, and Stable Diffusion are all developed based on this foundational model.
- Latent Diffusion Model: This is an advanced version of the diffusion model, engineered to produce image graphics more swiftly and with reduced demands on computational resources and memory.
- Stable Diffusion: Commonly abbreviated as SD, this model is based on the latent diffusion model mentioned above. It is named after its developing company, Stability AI, which essentially serves as a branding.
- Stable Diffusion Web UI: Short for Stable Diffusion Web User Interface, it is a web-based platform designed to operate the aforementioned Stable Diffusion model. Through this interface, users can control the model to generate images without the need to learn coding.
Navigating the Stable Diffusion Ecosystem
To fully harness the power of Stable Diffusion, it’s crucial to understand its key components:
- ClipText Text Encoder: This component is responsible for parsing the textual prompts you provide and translating them into features that the image generator can interpret and use as a blueprint for image creation.
- Diffusion Model: The U-Net neural network and the Scheduler sampling algorithm work in tandem to generate images from the noise, with the U-Net handling feature extraction and the Scheduler dictating the denoising process.
- VAE Model: The Variational Auto Encoder serves as the decoder, tasked with converting the compressed data from the latent space back into a high-fidelity image.
How to Generate an AI Image with Stable Diffusion
So after understanding the basics about Stable Diffusion, I think you would love to know how to use it to create an unique AI image. And whether you’re a seasoned artist or a novice explorer, this guide will walk you through the process of creating AI images using Stable Diffusion.
Step 1: Accessing Stable Diffusion
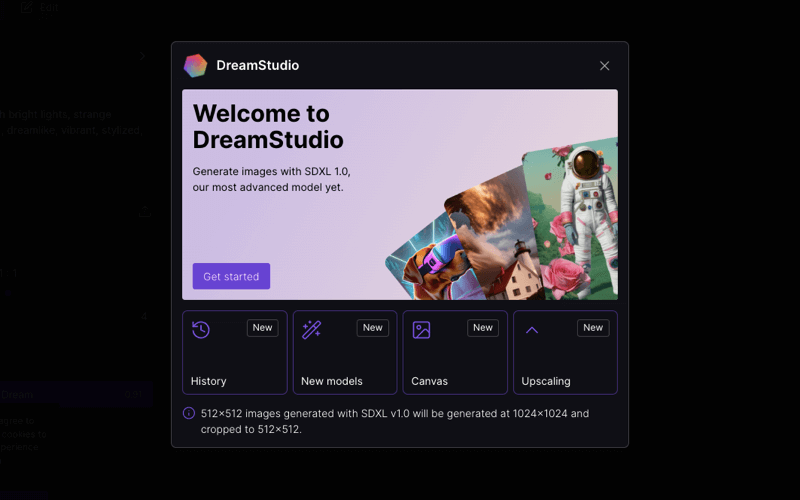
To begin, you’ll need to access the Stable Diffusion model. This can be done through the Web UI or by setting up the model locally on your machine. First of all, visit the official website or a community-driven platform (Clipdrop, DreamStudio or Hugging Face) that hosts the SD WebUI and then follow the instructions provided to launch the interface.
Here we will take DreamStudio as an example to show you how to generate an image with Stable Diffusion.
Step 2: Crafting Your Prompt
The quality of your AI-generated image largely depends on the prompt you provide. A well-crafted prompt should be clear, descriptive, and as specific as possible. Think about the image you want to create and write a prompt that includes details such as the subject, style, colors, and mood. And you can also use artistic or technical terms if you have a clear vision of the style you’re aiming for.
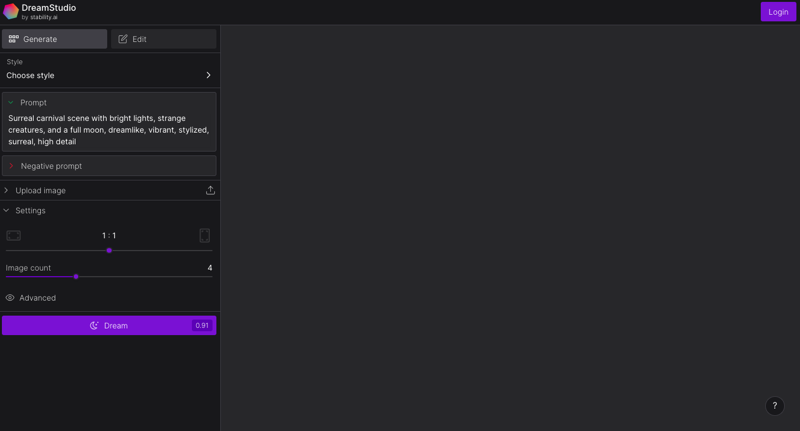
Step 3: Generating Your Image
Once you have your prompt ready, it’s time to generate your image. Now paste your prompt into the designated text box in the SD WebUI. Adjust any additional settings, such as seed (for randomness control), steps (for image refinement), and style (if the interface provides options). Click the ‘Generate’ button to start the image creation process.
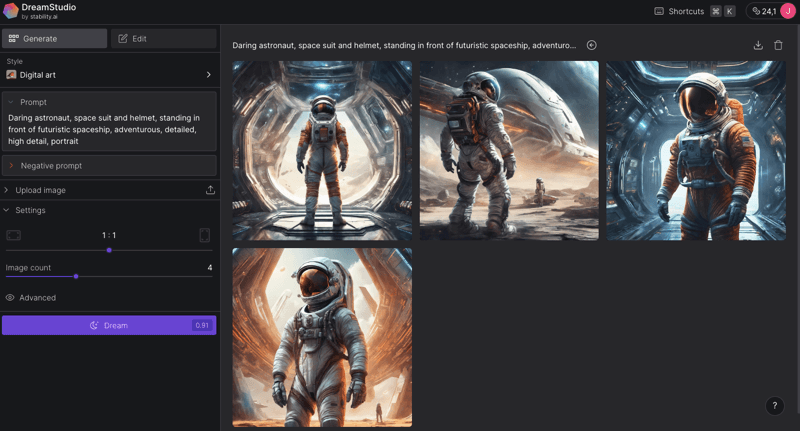
Step 4: Reviewing and Refining
After the AI has processed your prompt, you’ll be presented with a preview of the generated image. Evaluate the image against your original vision. If the image doesn’t meet your expectations, refine your prompt or adjust the settings. Regenerate the image until you’re satisfied with the result.
Step 5: Downloading and Using Your AI Image
Once you have an image you’re happy with, you can download it for use in your projects. Click the ‘Download’ button to save the image to your device. Use the image in your creative projects, ensuring you’re aware of any licensing or usage restrictions.
Step 6: Exploring Advanced Features (Optional)
As you become more comfortable with Stable Diffusion, consider exploring advanced features:
- Experiment with different styles, such as vintage or futuristic.
- Use the ‘UpScale’ plugin for higher-resolution images.
- Try ‘ControlNet’ for more precise control over the image elements.
4 Steps to Create Consistent Characters in Stable Diffusion
Crafting consistent imaginary characters using Stable Diffusion requires meticulous fine-tuning of the model to align with your specific creative vision. By following these key techniques, you can achieve a high level of consistency in your character generation, ensuring that each iteration remains true to your original concept.
Step 1: Create a Reference Image
The initial step is to develop a reference image that visually represents your character. This image can be an original artwork, a commissioned piece, or an AI-generated image.
Having a reference image serves as a visual guide for Stable Diffusion. Providing this image alongside your future prompts gives the model a clear exemplar to emulate, enhancing its understanding of the character’s desired appearance.
Tips for a good reference image:
- Full Character Display: Ensure the image shows the complete character with clear and detailed features.
- High-Resolution Quality: Use high-resolution images to capture intricate details.
- Unique Attributes: Include distinctive features such as clothing, weapons, and accessories.
- Personality and Emotion: Capture the character’s personality and emotional expression.
Step 2: Add Details to the Prompt
The text prompt is crucial for controlling Stable Diffusion’s output. For consistent character generation, your prompts need to be exceptionally detailed and specific.
Include details such as:
- Character Name
- Gender
- Physical Attributes: Face shape, skin color, height, build, etc.
- Hairstyle and Color
- Outfit Descriptions: Colors, materials, armor, and other specifics.
- Personality Traits
- Setting/Scene Descriptors
Providing unique and specific details ensures that Stable Diffusion generates consistent renditions of your character. Reusing the same descriptors in each prompt helps maintain alignment across different images.
Step 3: Use Control Nets
Control nets are a powerful tool for guiding the diffusion process during character generation. They compare the outputs from Stable Diffusion to your reference image, adjusting the weights when the outputs deviate too far from the reference.
You can create a control net from your character reference image on platforms like Automatic1111 and apply it when generating new images.
Control nets function like reins, directing Stable Diffusion’s creative process to remain true to your original character concept.
Step 4: Experiment with Different Settings
Stable Diffusion offers various settings that you can tweak to enhance character consistency:
- Seed Number: The seed determines the starting noise. Using the same seed with the same prompt will yield the same output, crucial for maintaining consistency.
- Steps: Higher steps provide more diffusion time for details to emerge. Experiment with step counts between 50-100.
- Sampling Method: “Euler a” is optimal for sharp details, while “Euler” is softer and may help when images appear malformed.
- CFG Scale: Adjust this value from the default 7.5 to modify image coherence.
- Size: Larger image sizes, such as 512×512 or higher, are preferable as smaller sizes may lose important character details.
Take the time to explore how different settings impact your generated characters. Finding the right balance among these settings will significantly improve character consistency.
Conclusion
Keep an eye out for the next installment in this series, where we’ll guide you through the deployment process of Stable Diffusion and share valuable tips and tricks to enhance your AI-generated art journey.